TM 5-6675-348-13&P
NOTE
If difference between X1 and X2 is less than 0.02 ft (1/4 in. or 0.64 cm), no adjustment is
necessary.
If difference is between 0.02 ft (1/4 in. or 0.64 cm) and 0.12 ft (1-1/2 in. or 3.81 cm), you
can continue with this procedure.
If difference is 0.12 ft (1-1/2 in. or 3.81 cm) or greater, the unit must be recalibrated at an
authorized service center. You cannot recalibrate the unit in the field without damage to
the unit.
(8)
Calculate the "X" average = (X 1 + X 2)/2 and have rodman adjust detector on rod to the "X"
average. (Center of detector is between the two readings.)
NOTE
Calibration screws are labeled "X" and "Y".
(9)
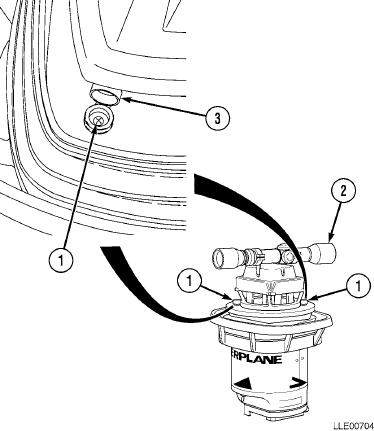
Locate the "X" calibration screw (1) and adjust it to align beam to the "X" average at 1145-2 Laser
Transmitter. One full turn of calibration screw moves beam approximately 0.04 ft (1/2 in. or 1.3 cm)
in 200 ft (60.96 m). If beam cannot be aligned by gentle turning of calibration screw (1), return unit
to an authorized service center for calibration.
(10) After adjusting beam, allow 4 minutes for unit to stabilize before taking next reading. Repeat
Steps (4) through (8) to check your work. Do a fine readjust, if necessary.
(11) After adjusting the "X" axis to rotate
1145-2 Laser Transmitter 90 degrees
to the "Y" axis.
(12) Point the "Y" axis directly at rodman.
(13) Using sighting telescope (2) or groove
and repeat above Steps (6) through
(10).
(14) Call readings Y1 and Y2 and calculate
the "Y" axis average just as you did in
Step (8).
(15) Secure rubber caps (3) over calibration
screws (1).
5-20

