
b. Disassembly.
Refer to figure 63 and
disassemble the horizontal clamp.
c. Cleaning, Inspection, and Repair.
(1) Clean all metal parts with a cloth
dampened with an approved cleaning
solvent and dry thoroughly.
(2) Inspect the clamp for burs, cracks,
breaks, and worn or damaged threads.
(3) Inspect the pins and jaw for scoring, burs,
and wear. Inspect the lever for wear,
cracks, and damage. Inspect the knob for
burs and damaged threaded surfaces.
(4) Remove all burs and minor scoring and
scratches from polished surfaces.
(5) Repair or replace all damaged or
defective parts.
d. Reassembly. Refer to figure 63 and reassemble
the horizontal clamp.
e. Installation.
(1) Refer to figure 62 and install the
horizontal clamp.
(2) Install the horizontal slow-motion screw
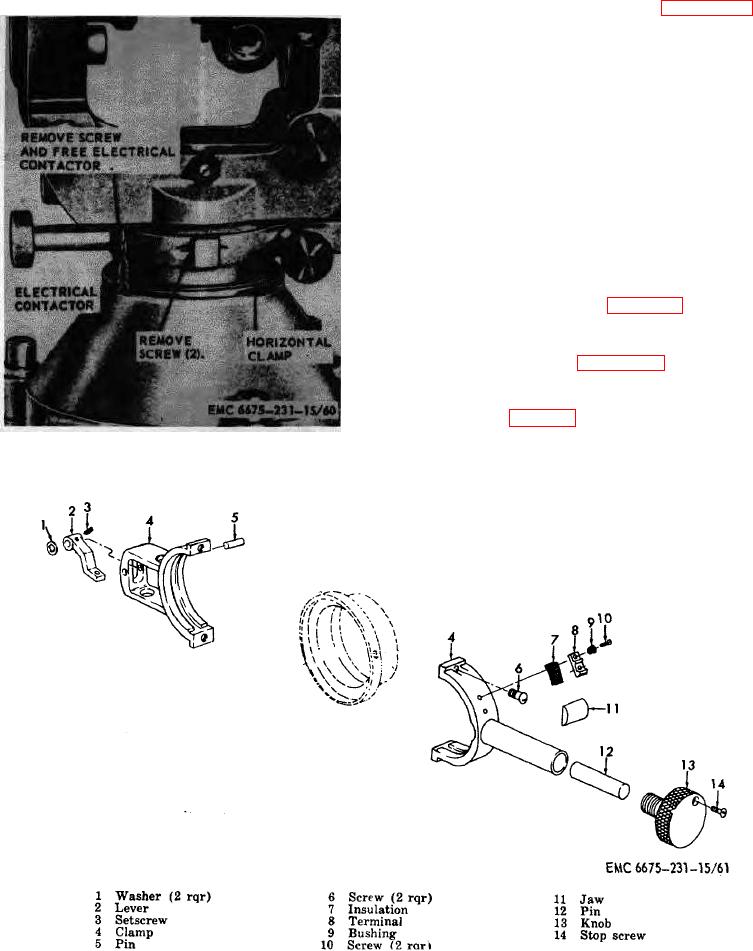
Figure 62. Horizontal clamp, removal and
installation.
Figure 63. Horizontal clamp, disassembly and reassembly
77
AGO 5078A